9. Write your first mutation
In this section, you will write your first mutation to log in to the backend. A mutation is used to change data on your server. Here the login mutation will create a session based on your email address.
Note: The way you log in to this particular server might differ from the way you log in with your own server. Login is often handled by middleware, or a layer totally separate from GraphQL, like Oauth. Also note that a typical authentication flow should require a password but for this tutorial, anyone is allowed to book flights with a valid email address!
Prototype your mutation in GraphQL Playground
Open GraphQL Playground and select the login mutation in the docs tab on the right:
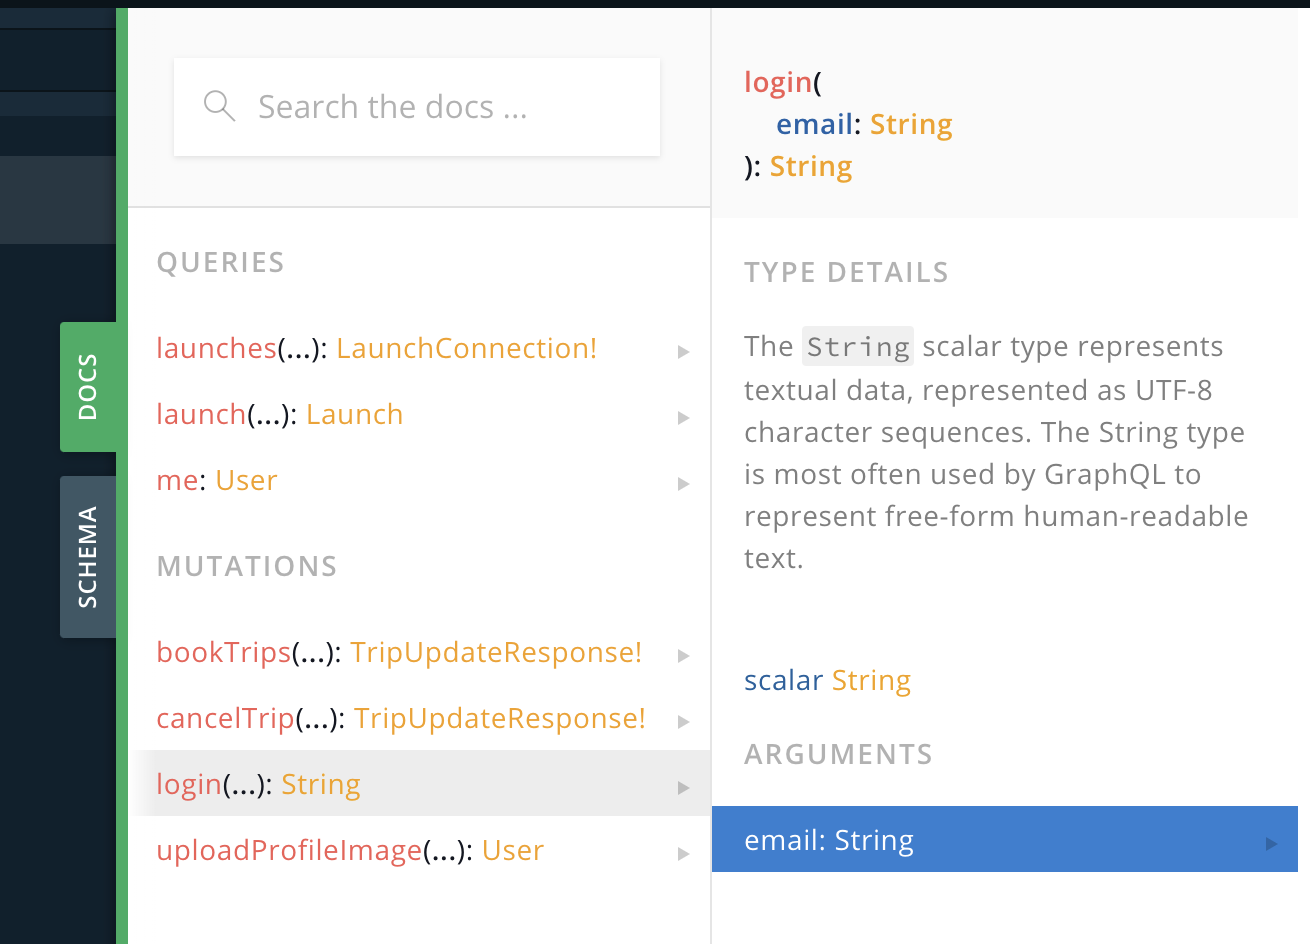
This mutation takes a single argument, the email address of the person being logged in. Unlike many GraphQL operations that return objects which need to have fields selected, the login mutation returns only a single string.
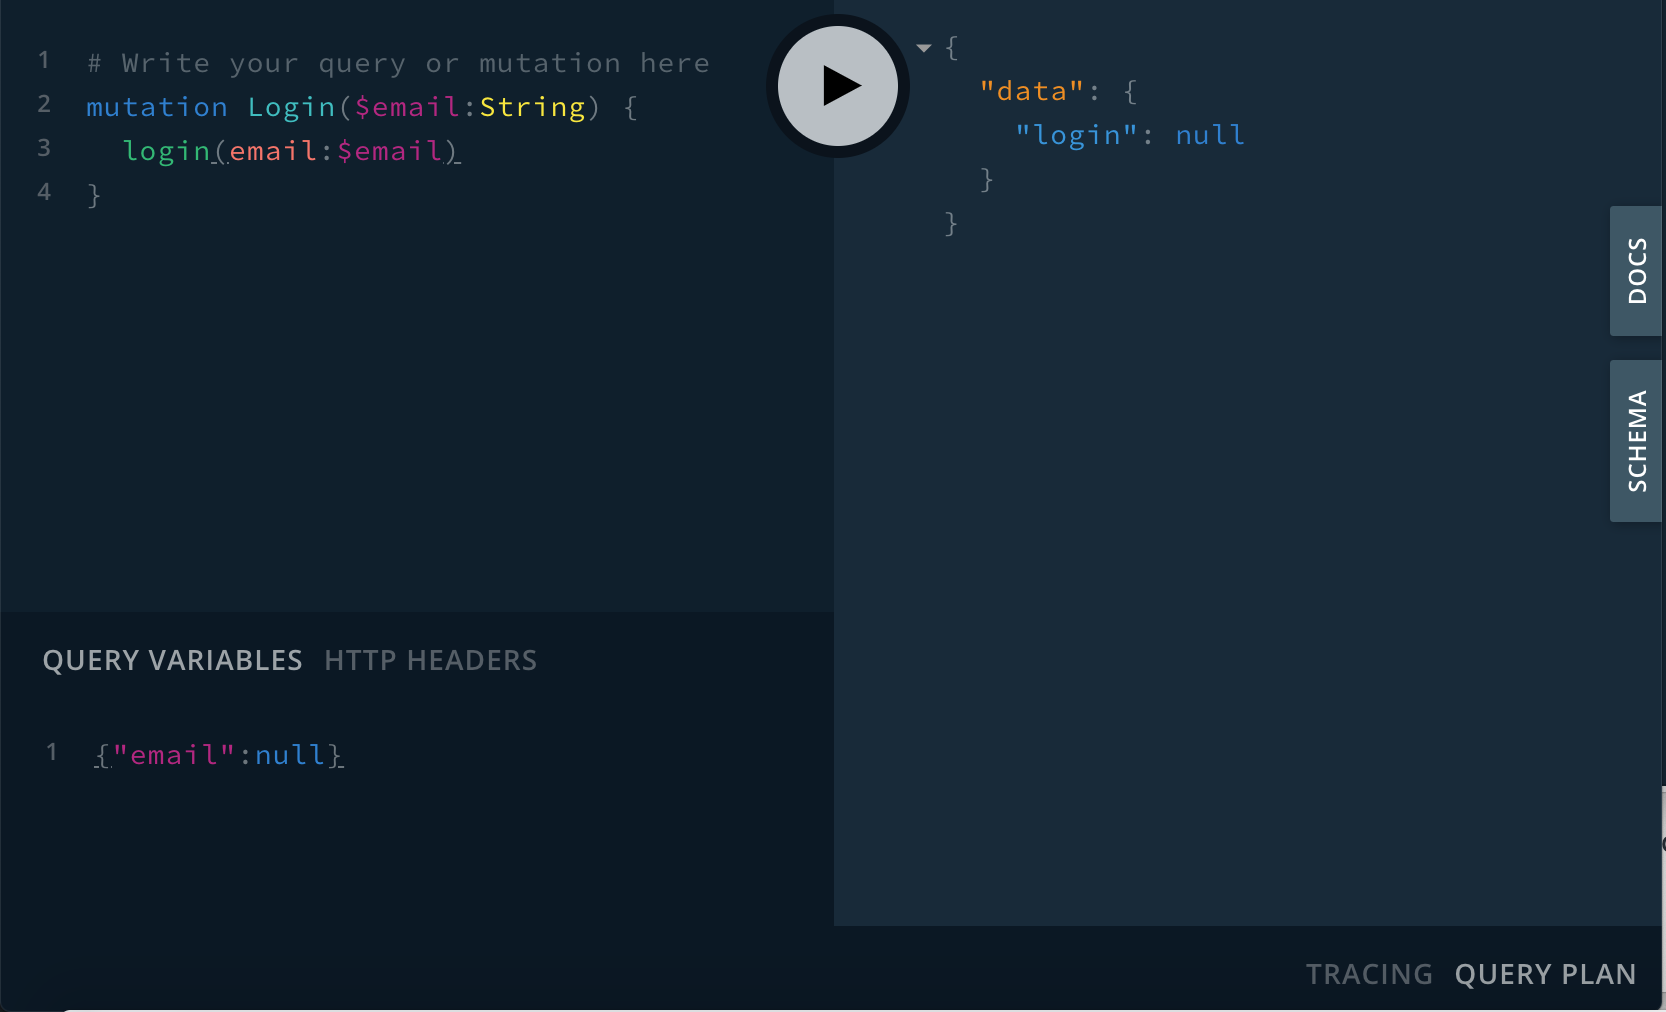
Type the following mutation in GraphiQL:
mutation Login($email: String) {
  login(email: $email)
}
If you hit Play, you should get a null login:
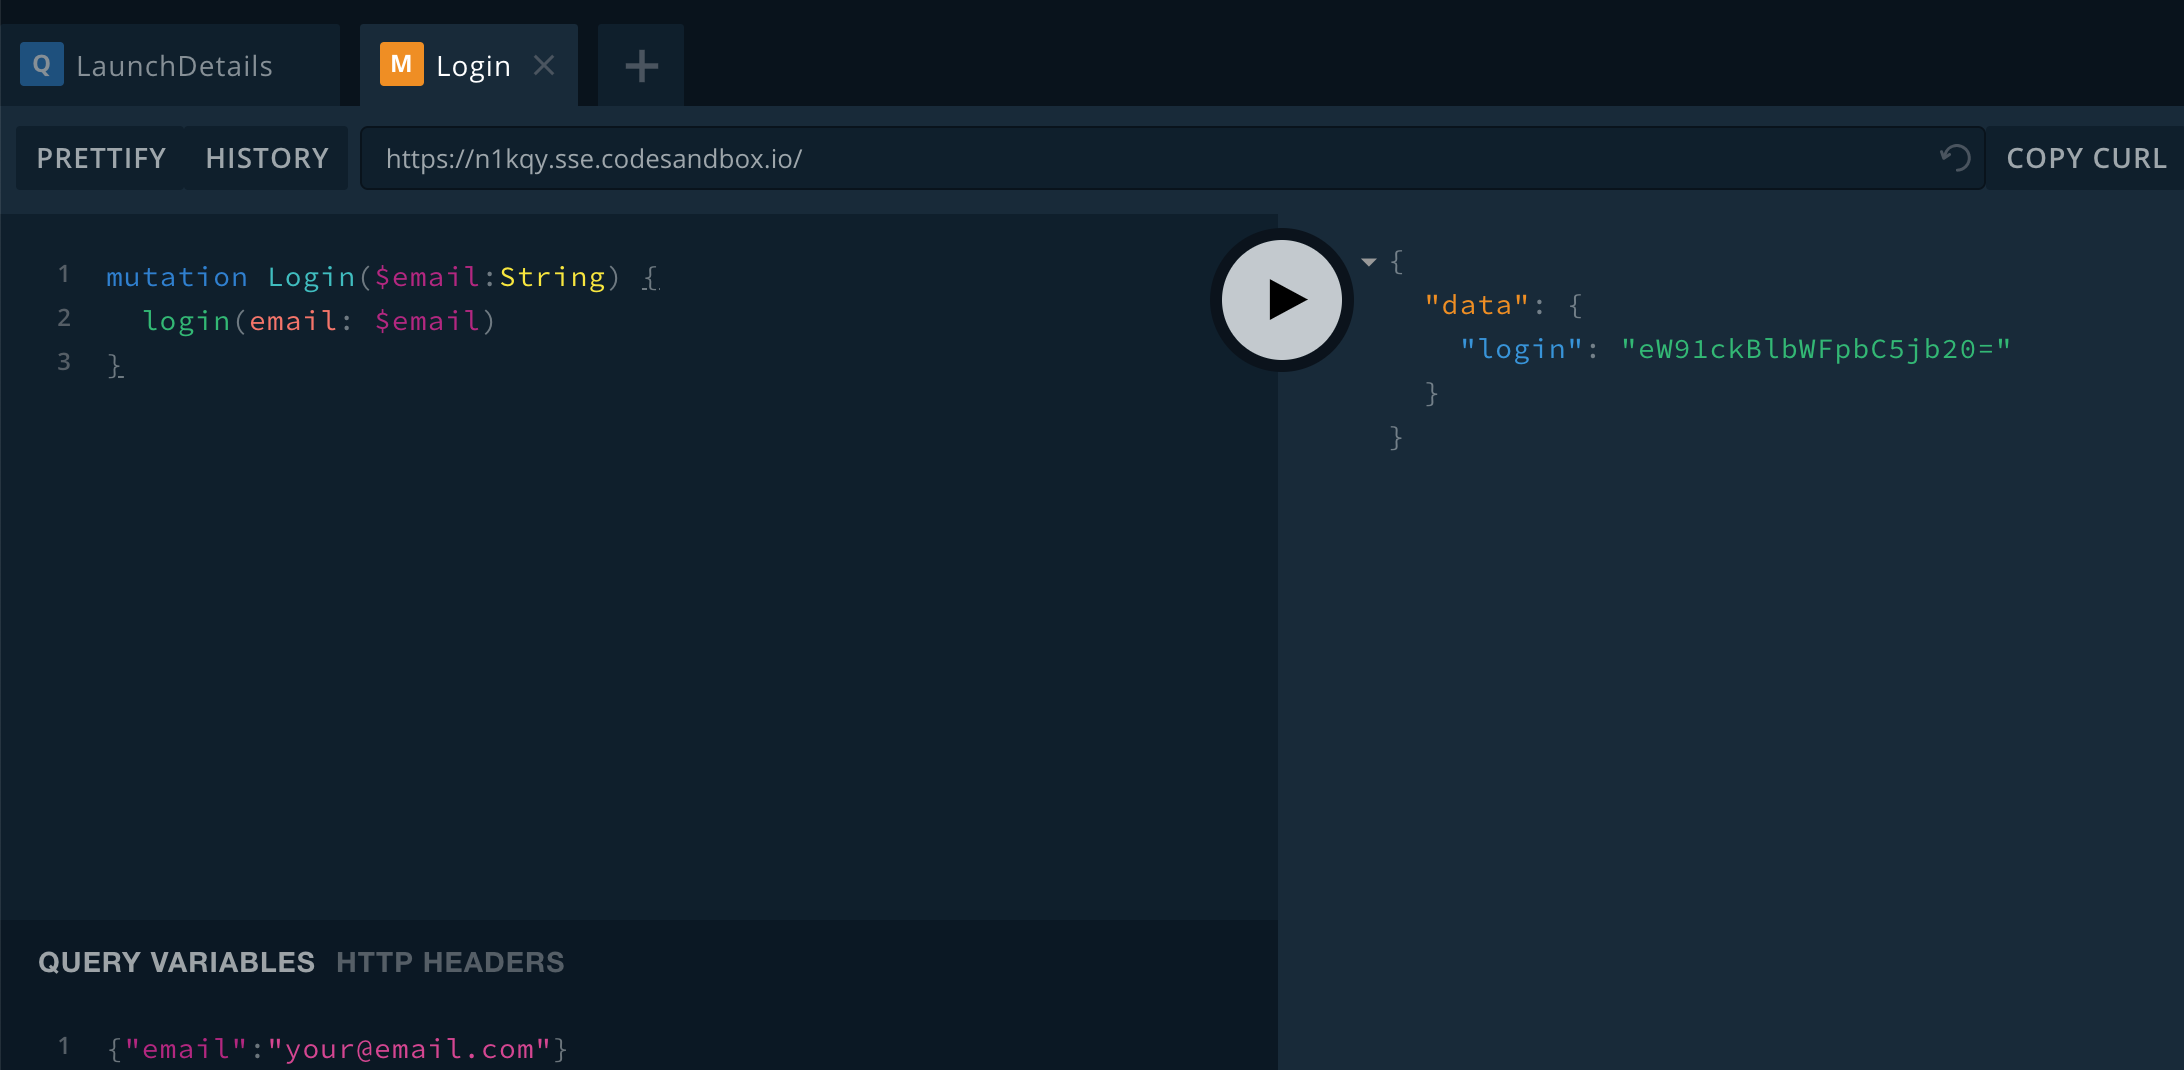
This is expected, because you didn't specify your email. To do so, add it to the Query Variables in the lower-left pane of GraphQL Playground:
{ "email": "me@example.com" }Press the Play button, and you'll get an actual response:
Add the mutation to the project
Now that your mutation is working, add it to your project. Create a file named Login.graphql next to schema.json and your other GraphQL files and paste the contents of the mutation:
mutation Login($email: String) {
  login(email: $email)
}
Connect the Submit button to your mutation
Open LoginFragment.kt and like you did for the other fragments, override onViewCreated. Add a click listener and some checks to verify that the email is a valid email:
    override fun onViewCreated(view: View, savedInstanceState: Bundle?) {
        super.onViewCreated(view, savedInstanceState)

        binding.submitProgressBar.visibility = View.GONE
        binding.submit.setOnClickListener {
            val email = binding.email.text.toString()
            if (!Patterns.EMAIL_ADDRESS.matcher(email).matches()) {
                binding.emailLayout.error = getString(R.string.invalid_email)
                return@setOnClickListener
            }
From the click listener, display the ProgressBar and execute the query with the email the user just entered:
            binding.submitProgressBar.visibility = View.VISIBLE
            binding.submit.visibility = View.GONE
            lifecycleScope.launchWhenResumed {
                val response = try {
                    apolloClient.mutate(LoginMutation(email = Input.fromNullable(email))).await()
                } catch (e: Exception) {
                    null
                }
Handle errors if needed:
                val login = response?.data?.login
                if (login == null || response.hasErrors()) {
                    binding.submitProgressBar.visibility = View.GONE
                    binding.submit.visibility = View.VISIBLE
                    return@launchWhenResumed
                }
Finally if everything is successful, store the login and go back to the previous screen:
                User.setToken(context!!, login)
                findNavController().popBackStack()
            }
        }
    }
User is a helper class that saves the token in EncryptedSharedPreference. This is the reason why this tutorial uses API level 23+. Apollo Android itself supports API levels 19+.
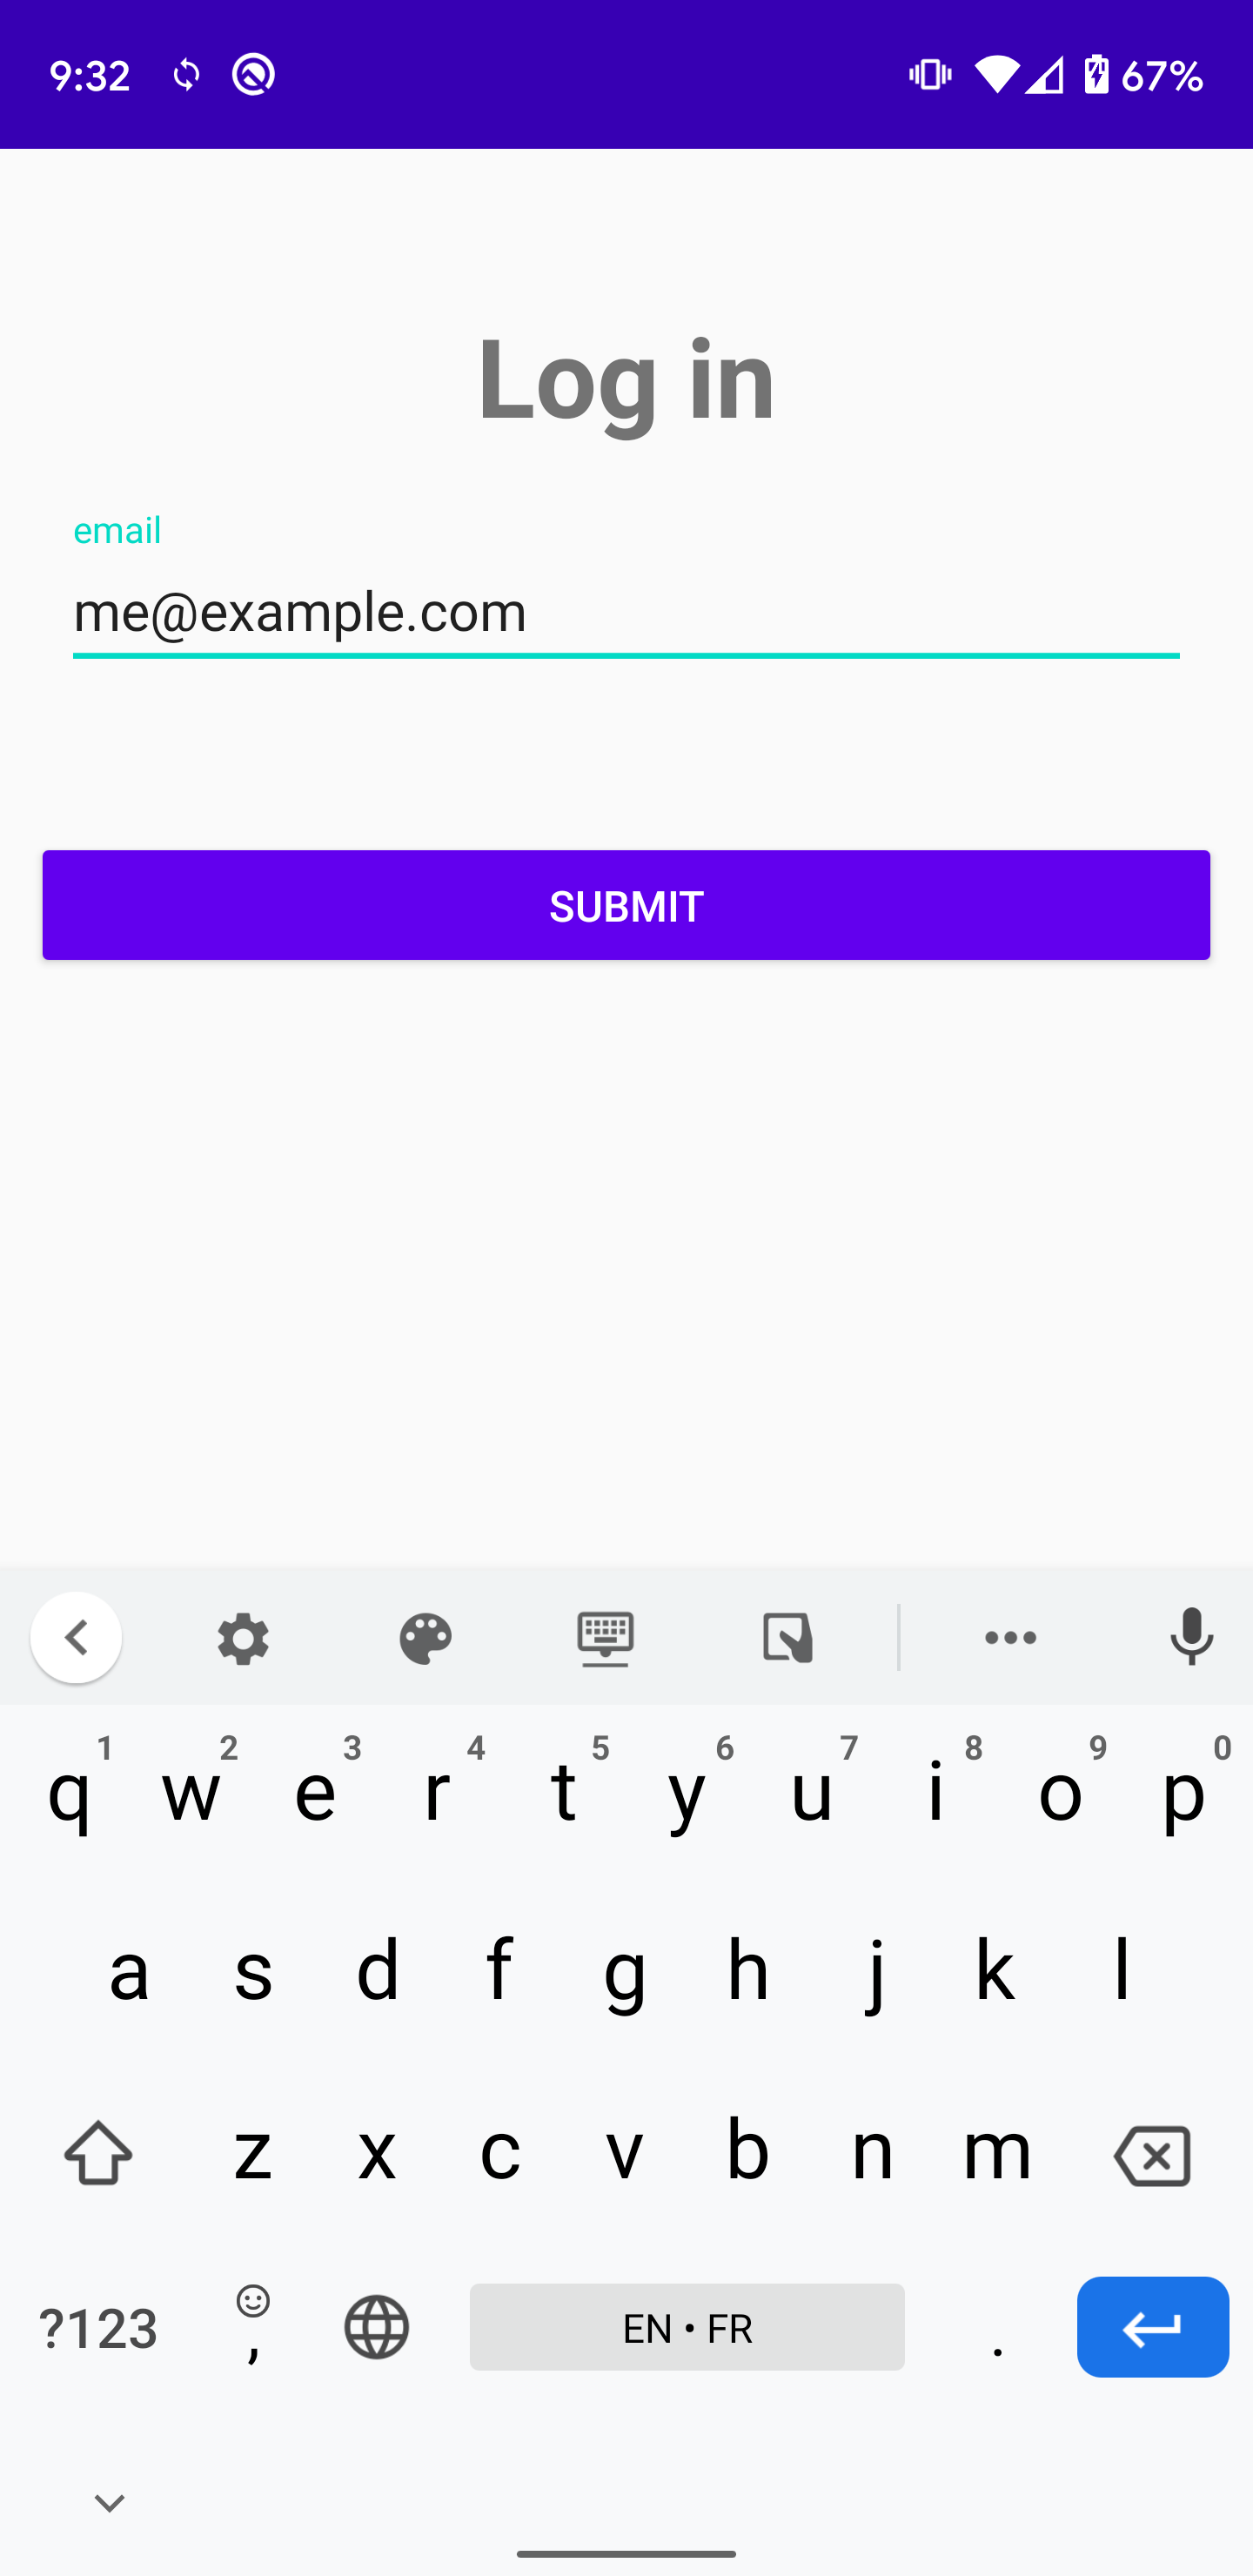
Test the login
Go the details fragment, click Book and in the Login fragment, enter your email and click Submit. You know have a token that allows you to authenticate your queries.
In the next section, you will authenticate your queries.